Building a Real Estate website may sound like an exhausting task at first, but with the emerging change in technology, everything has become digital and effortless, from ordering food or products to ordering or buying services. All of these with just some clicks or taps from a website or an application.
Thanks to the internet today, if someone wants to purchase a property, they can easily search for any real estate website and can get in contact with a real estate agent. Also, with so much information available on the internet, they can easily gain insights into what to look for in a property before contacting an agent.
If a real estate agent delivers enough information online that it fulfills the customers’ needs in every regard, their services will be used abundantly as it delivers value, credibility, and trust.
Build a Real Estate Website in 8 simple steps (2022)
- Register your Domain Name
- Set up your Web Host
- Connect your Domain with your Web Hosting
- Install WordPress
- Decide your website type
- Choose your theme
- Install Plugins
- Configure your website
Step 1: Register your Domain Name:
The first thing you must do while making a website is to register a domain name. A domain name is a name that you choose for your website. This is what the visitors search on the internet to find your website (for example realtor.com, iconprosolutions.com). A domain name has a great impact on the traffic of your website so while registering your domain name, make sure to select a name that is related to your niche and easy for the visitors to memorize.
There are many domain registrars from where you can get your domain name, and for this guide, we will use GoDaddy.com to demonstrate how to register your domain name.
- Once you visit godaddy.com, you’ll see a search box where you will enter your domain name to check whether the domain name you’ve chosen is available or not.
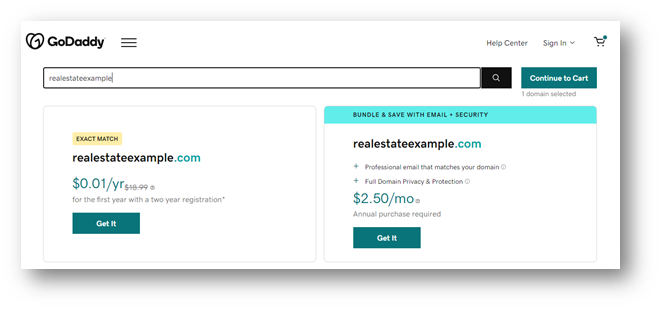
Now here, since our desired domain name is available, click continue to cart, and it will take you to payment options. Fill out the payment page using your necessary information and complete the checkout process.
Step 2: Set up your Web Host:
Every website needs to be connected to the internet 24 hours a day and 7 days a week so the people on the internet can visit and get familiar with the desired websites, and for that, a web host is a place where a website ‘lives’ with all its data. There are several hosting agencies where you can use their hosting services and host your website. Some of the popular hosting providers are:
You can request one of these agencies (or any hosting agency) to host your website and select a suitable payment plan depending on the type of web hosting that you’re selecting.
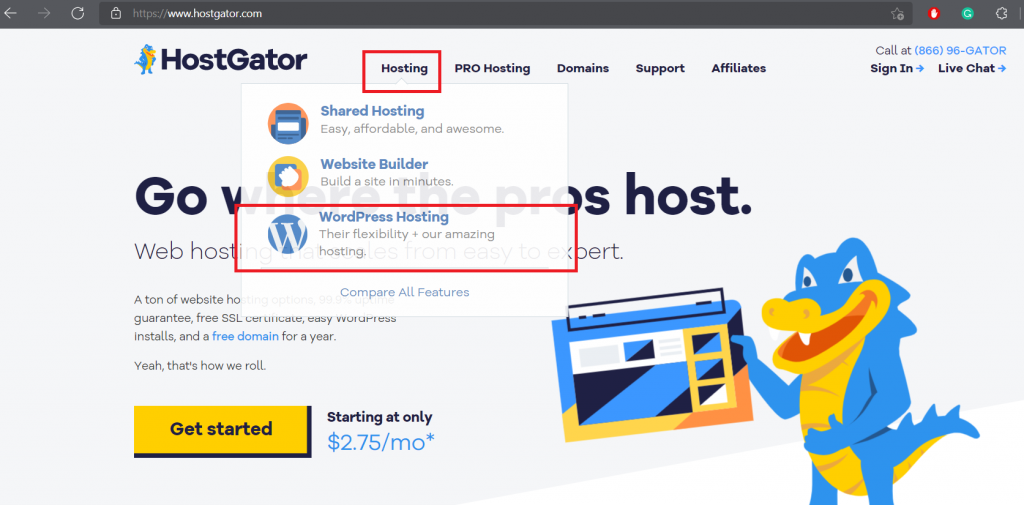
For this guide, we will use HostGator to host our website.
- Simply go to hostgator.com and hover your mouse on ‘Hosting’ and select WordPress Hosting
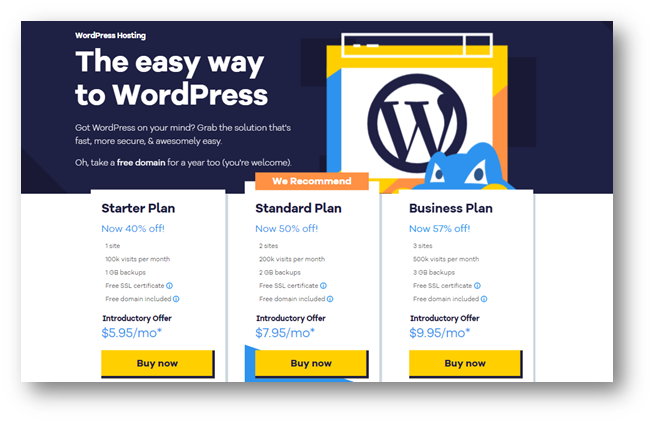
- It’ll take you to another page where you’ll select a suitable hosting plan (depending on your use) for your website.
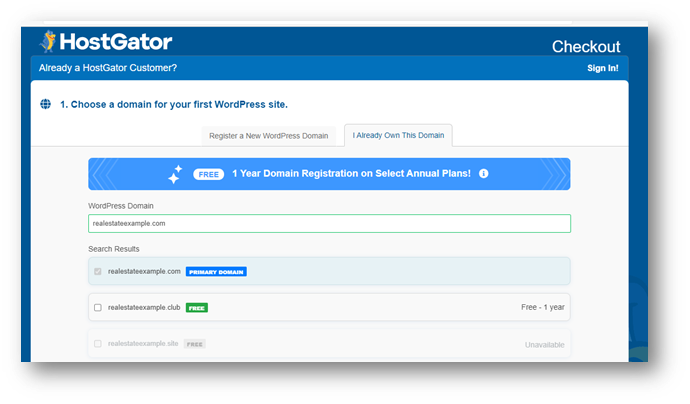
- Once you select your hosting plan, you’ll be taken to a new page where you’ll type in the domain name that you selected previously from godaddy.com.
- Since you already have your domain name. Therefore, you’ll select the ‘I Already Own This Domain’ option, and enter your domain
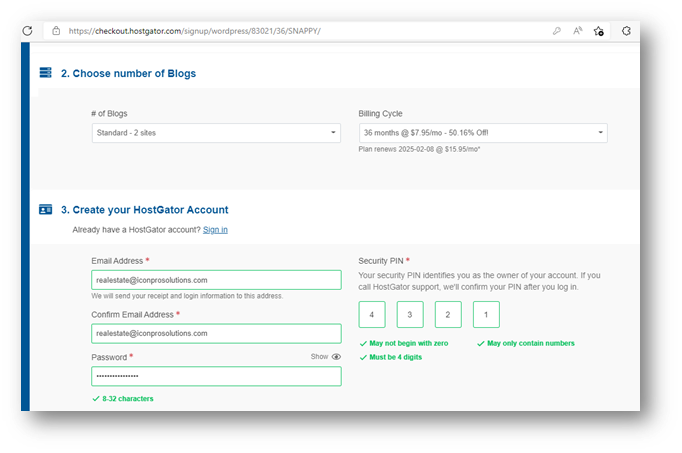
- After entering your domain, select the number of blogs you want to appear on your website and create your HostGator account along with a security pin for your account
- Scroll down the page and fill in your billing information, add Additional Services if you want, and checkout.
- After checking out, you’ll receive an email from HostGator
- Congratulations! your web hosting has been purchased
Step 3: Connect your Domain with your Web Hosting
The next step is connecting your Domain with your Web Host account.
- Go to godaddy.com and log in with the account that you made previously in step 1.
- Under the ‘My Products’ tab, it will be showing the list of your domains
- On the right-hand side of the domain that you registered previously in step 1, click on DNS

- After visiting the DNS section, navigate to the Nameservers section
- There you’ll see 2 nameservers i.e. ns1 and ns2
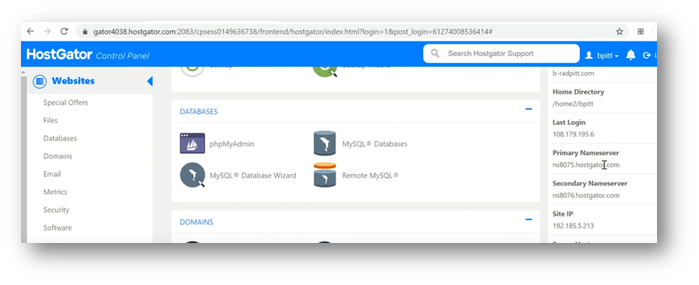
- You must copy the name servers either from the email sent to you by HostGator or you can copy them from the cPanel of the HostGator website portal
(To copy from the HostGator cPanel go to portal.hostgator.com –> Hosting –> cPanel)
- If you’re copying from the cPanel, it will appear on the right hand of the cPanel page i.e. Primary Nameserver and Secondary Nameserver
- Copy both the name servers and it will be your ns1 and ns2
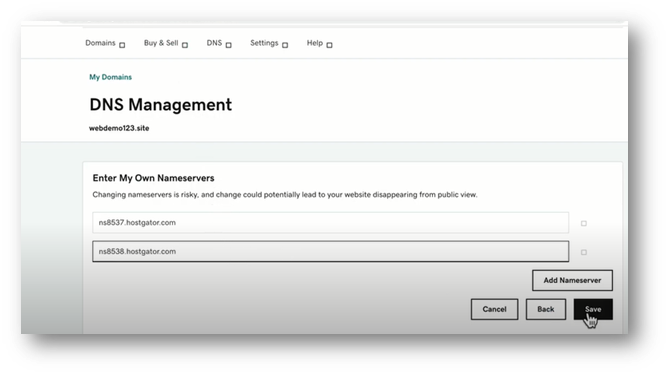
- In the Nameservers Section click change then –> enter my own nameservers(advanced)
- Now paste both the name servers and you’re done
Step 4: Install WordPress
Once you’ve connected your domain and web host, now it’s time to install WordPress. Most hosting services including GoDaddy, make the WordPress installer available through your cPanel dashboard.
Follow the below steps to install WordPress from GoDaddy’s cPanel.
- Access your GoDaddy cPanel
- Scroll down to the ‘Featured Applications’ section
- Install WordPress
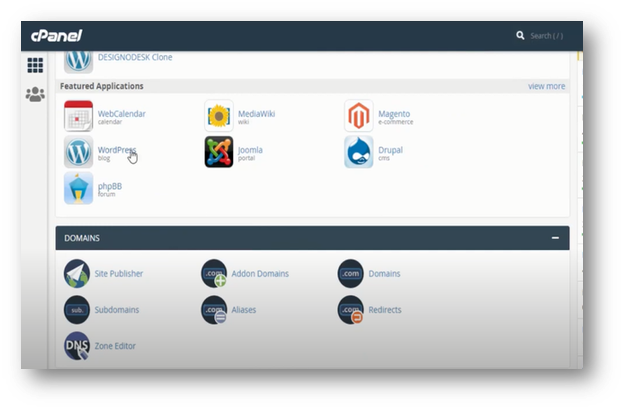
- If you can’t find WordPress or their website looks different, just search WordPress in the search bar and install it.
- When you try to install it, it will show you some information regarding the installation.
- Review them and you can leave many of these things set to default settings and you’re good to go.
Step 5: Decide the Type of your Website
Before starting off to select your website theme, you must decide what purpose will your website serve to your visitors. There are various types of real estate websites you could build, and it’s important to have a clear image of your website in your mind before you start building your website because you will be designing your website according to the ‘type’ of your website.
If you have not decided on the type of your website yet, don’t worry! we got you covered, but if have, you can just start off building your website. There are mainly three types of real estate websites.
Commercial real estate
Commercial real estate refers to lands and building exclusively for business purposes, such as banks, hospitals, shopping malls, hotels, and the list goes on.

Residential real estate
Residential real estate is any property or housing for individuals and families. Examples include single-family homes, apartments, duplexes, and other types of living arrangements.
Industrial real estate
Industrial real estate consists of properties that are used by industries to carry out their activities such as manufacturing, production, construction, storage, etc.

Step 6: Choose your theme
With WordPress installed, now it’s time to select a theme for your website. By now, you should have decided the type of your website and we’re going to select the theme accordingly from WordPress. You can also use platforms other than WordPress for your theme selection such as Themeforest, Wix, Elementor.
- From your WordPress dashboard, hover your mouse on appearance and then select Themes
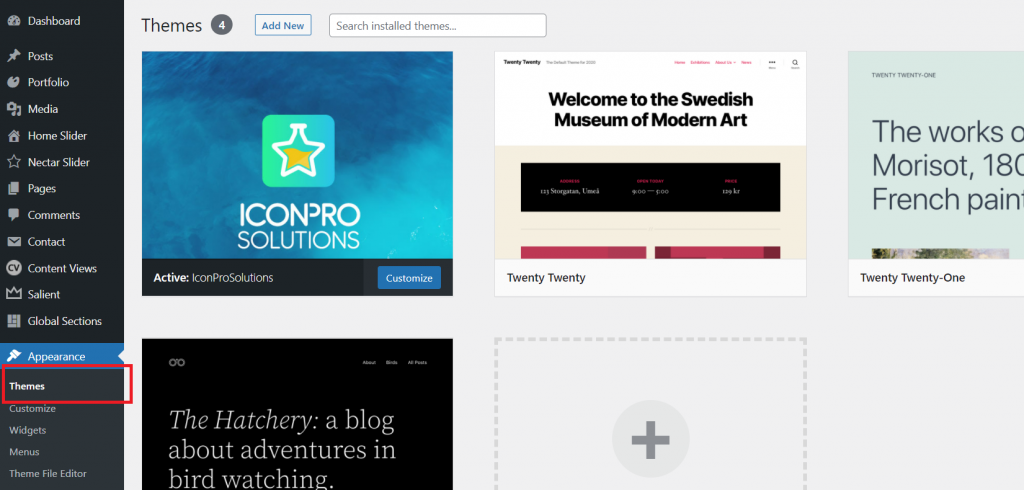
- Search ‘real state’, and there it will show themes related to it. If you don’t like themes, you can always import themes from other platforms mentioned above.
Step 7: Install Plugins
A WordPress plugin is a piece of software that adds new functionality or extends existing functionality on a WordPress website. Certain features cannot be managed by using theme only such as forms, tables, e-commerce features, backup, and more.
- From your WordPress dashboard, click on the Plugins menu and then click “Add new”
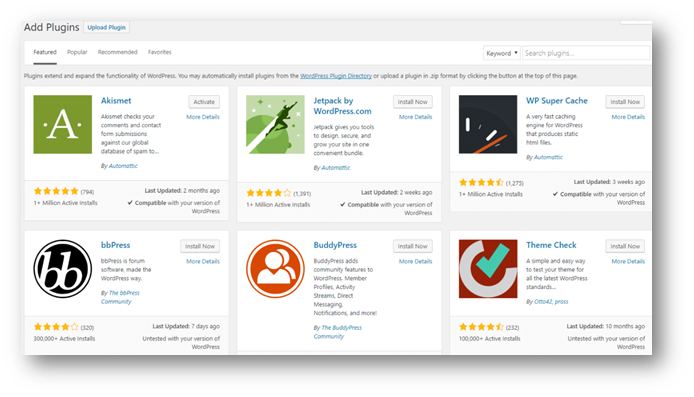
- Install or activate (If you’ve already installed) any of the plugins to apply it on your website.
Step 8: Configure your site
Once you’re satisfied with your website design, functionality, and interface, now it’s time to add content to it. To attract more traffic to your website, you must facilitate your site visitors with these features.
Search Filters
Your website should contain a search bar as it makes it easier for your visitors to search for a property or a specific type of property. Including a search bar helps a lot in finding relevant and desired information quickly.
Map View
When searching for a property, including a map view for a property will give great insight about the property as it not only includes the location of the property but also the facilities present near that property.
Property Listing page
Your property listing page should contain as much information as needed while displaying a property. Usually, a listing’s page should have:
-
- Images of the property
- A map, to display the location of the property
- Facts about the property
- Property’s owner contact
Blogs
Writing blogs on your website is optional, but it’s strongly recommended to add a blog section to your website where you can share your insights about the real estate market, or you can write articles about the market using your knowledge and experience. Adding a blog section to your website helps you in growing your audience and promoting your business through search engines.