How to Speed Up Your Windows Computer

Just like any other electronic gear/gadget, Windows operating systems also tend to deteriorate in performance and slow down over time. It can be due to many reasons, for example, it could be due to your old and slow Hard Drive, your computer’s memory i.e. RAM size being too small as it’s supposed to be, or there are too many startup applications that start with your windows.
With all the above possibilities being said, this blog will surely speed up your windows’ performance by taking it to new heights by following the simple steps provided below.
1. Uninstall Unnecessary Software
Free space is the key! Free up your hard drive’s space by uninstalling the software you don’t use. When you keep those unnecessary programs on your computer, they consume your computer’s storage. Not to mention that there are programs that start their execution as soon as the windows boots up and start consuming RAM (even when you don’t need them).
Usually, the user is unaware of those unnecessary programs that are constantly running in the background and consuming memory which later results in poor windows performance (RAM).
Here’s what you can do to get rid of all your unnecessary software.
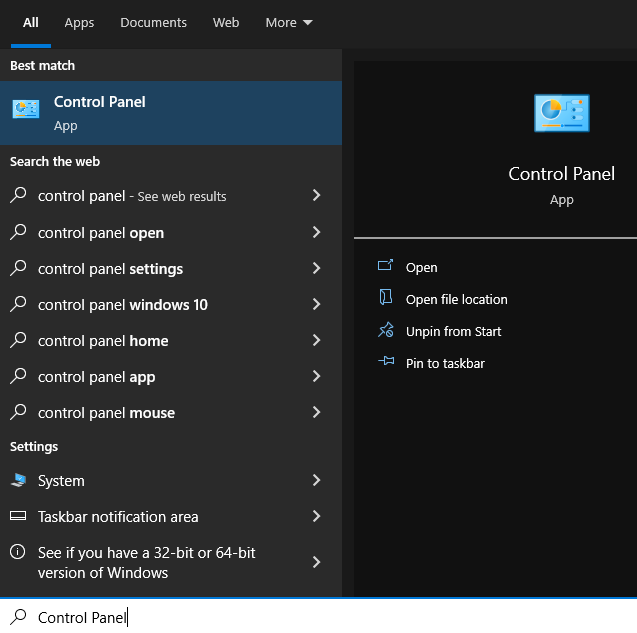
- Click on ‘Start’
- Type “Control Panel” and open it
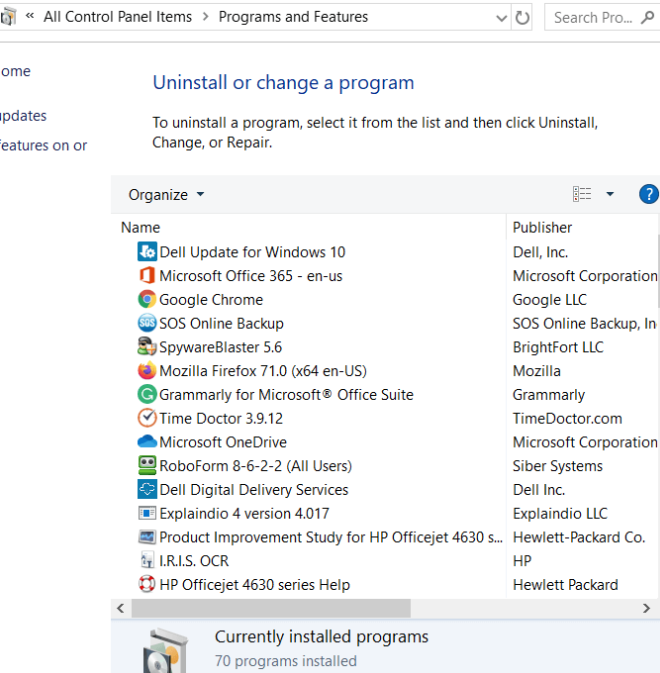
- Click on ‘Programs’ and then “Programs and Features”

- Now uninstall the programs that you don’t use/need to free up space
2. Delete all the Temporary Files
As the name suggests, temporary files are the type of files that hold data temporarily when a file is being created or modified. Temporary files usually have short-term utility and don’t store permanent data. Therefore, it’s totally safe and convenient to remove them and free up space.
Therefore, to remove them:
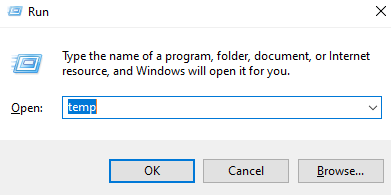
- Go to ‘Start’ and type “Run” OR use the shortcut Windows + r button
- Now type “temp” and press ‘Enter’
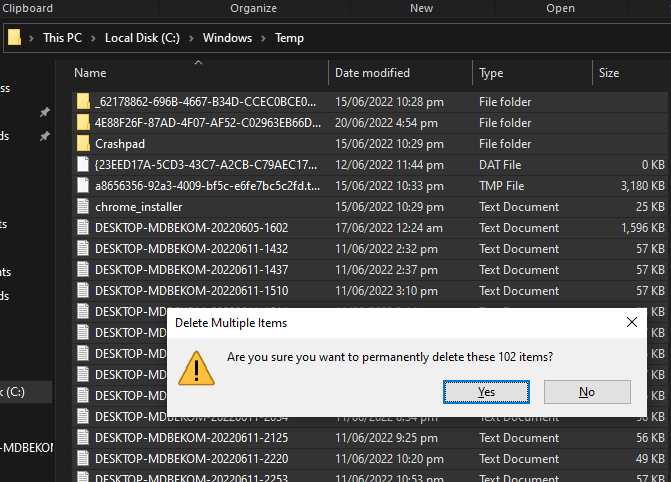
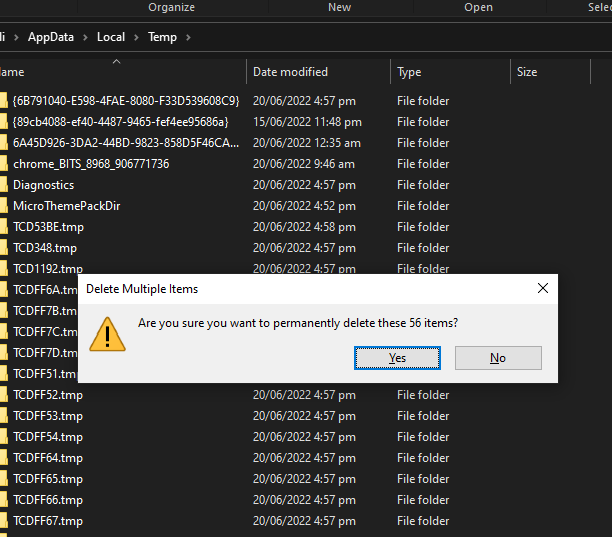
- Now select all (ctrl+a) those temporary files and delete them
- Again, go to ‘Run’ (Step 2)
- This time type “%temp%” (without quotes)
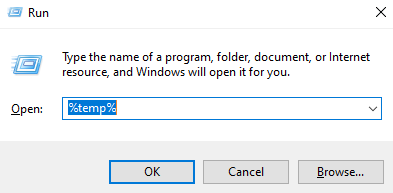
- Select all (ctrl+a) the temporary files and delete them
3. Disable the Programs that Run on Startup
Another factor that contributes to slowing down your computer (usually boot time) is the startup programs. They start their execution as soon as your computer boots up and they constantly run in the background. Mostly, it happens when you install a program/software such as Skype, which is by default set to execute every time the computer starts.
Each startup program adds up and consumes a specific amount of RAM depending upon its size and execution pattern. Hence, we have to keep the RAM as free as possible so it can be used for the tasks assigned by us.
The process to disable startup programs is quite simple:
- Start Task Manager by using the shortcut Ctrl + Alt + Del OR Ctrl + Shift +Esc
- Select the “Startup” tab
- Analyze the programs that are ‘enabled’ to run on startup
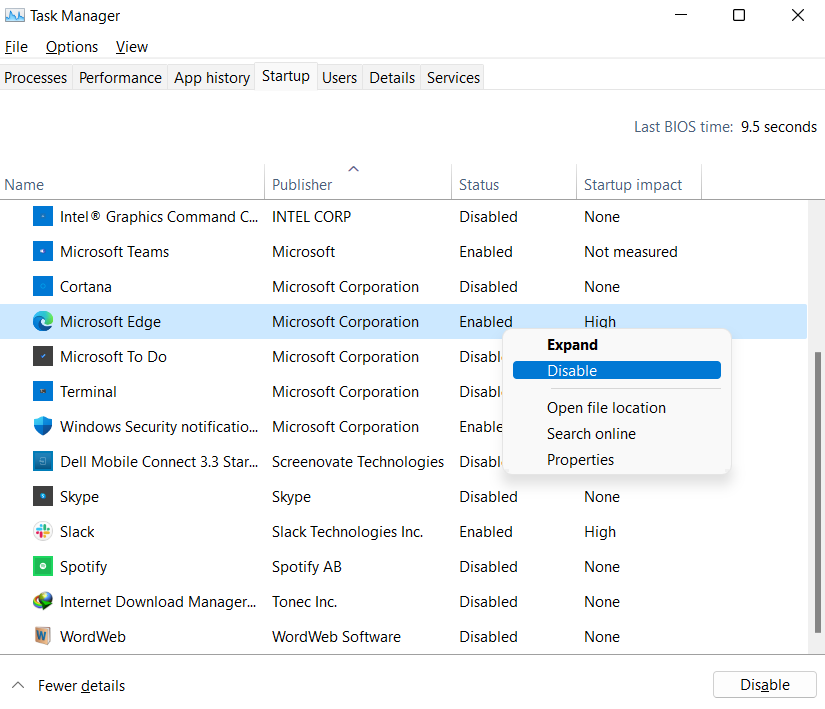
- Disable the unnecessary ones which you don’t want to run on startup
4. Disable the Windows Search Index
Windows search indexing is a built-in service by Windows that indexes all of your files and folders. It basically maps out the metadata of your files so when you search for a specific file/folder, it points to the data that has been searched for. This service is mostly used by users who are constantly utilizing the ‘Search’ option when searching for their files.
The big deal about this service is that it consumes a relatively large portion of your RAM. Disabling it doesn’t mean that you can’t search for your files anymore, but it just takes a little longer for Windows to search for your files.
To disable Windows Search Indexing follow these steps:
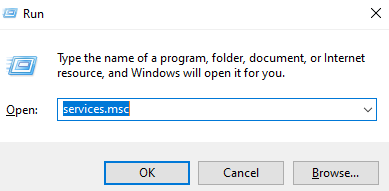
- Go to ‘Start’ and type ‘Run’ OR use the shortcut Windows + r button
- Type “services.msc” and press ‘Enter’
- Scroll down and find “Windows Search”
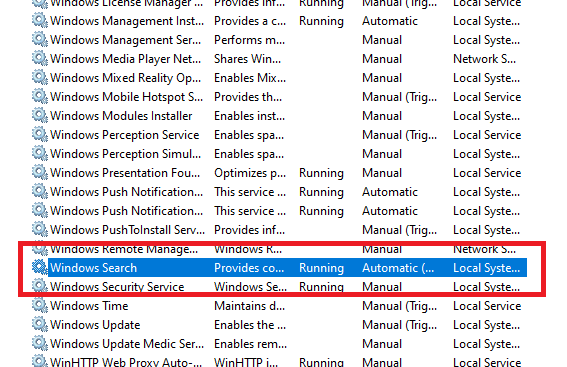
- Double click to open its window
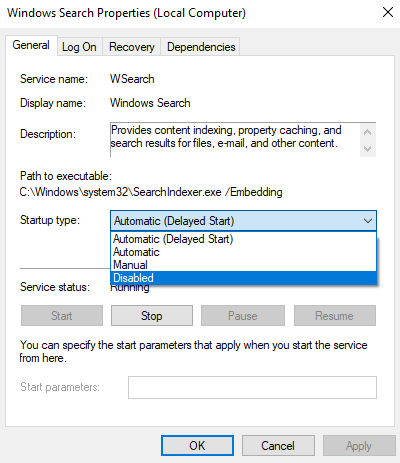
- From the list of ‘Startup type’ select ‘Disabled’ and then ‘Stop’ the service
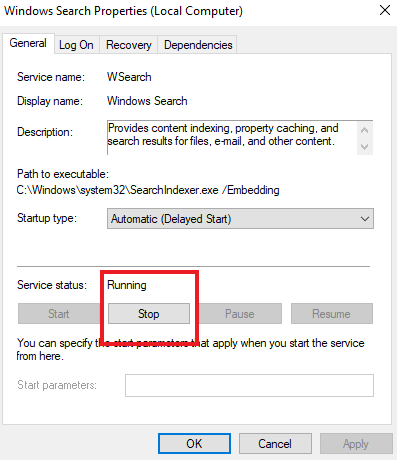
- Now click ‘Apply’ to save the changes
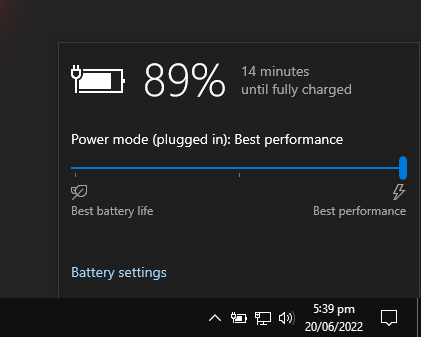
5. Change your Power Mode
When it comes to choosing power plans, Windows automatically assumes that you want a power-efficient plan so you can save electricity. Therefore, by default, it sets your power plan to “Power Saving” or “Balanced” plan. But there’s always a trade-off between electricity and performance when it comes to these plans. Hence, to experience the maximum performance of your pc you can switch to the “High Performance” plan.
To do that, follow these steps:
- From the taskbar, click on the ‘battery’ icon
- Now drag the slide to ‘Best Performance’
6. Disable the Transparency Effect
The transparency effect is another factor that adds up to affect your Windows performance. Although the effect seems light and simple, surprisingly, it takes a lot of work to create these effects, and turning them off makes a significant difference to your computer’s performance.
To turn off the Transparency effect:
- Open the ‘Settings’ menu from ‘Start’
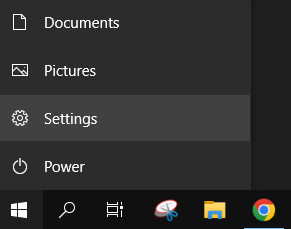
- Go to the ‘Personalization’ tab and then ‘Colors’
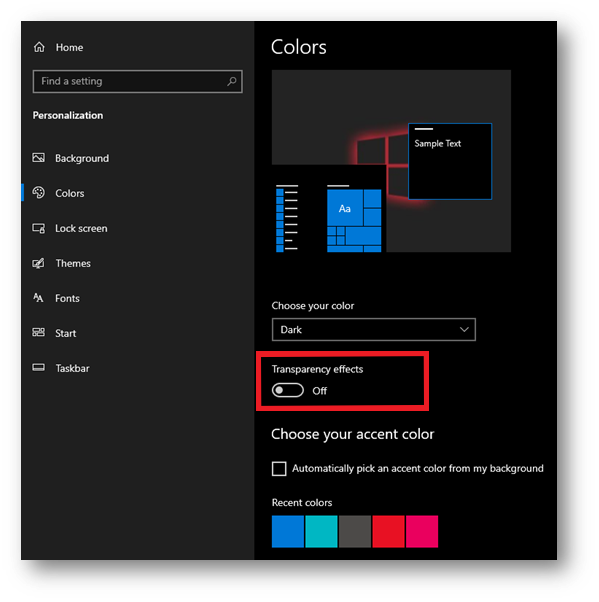
- Now toggle the ‘Transparency effects’ to turn it off
7. Close Programs from System Tray
Usually, disabling startup applications from running at the start does the job but most of the time, some programs hide in the system tray when you close them. For instance, software like Skype, Microsoft Teams, and many others are programmed this way. It happens because, by default, they are set to these settings by the developers of the software.
So, a good practice is to keep your RAM free by completely closing/exiting these programs.
To close these programs:
- From the ‘Taskbar’ click on the arrow pointing upwards
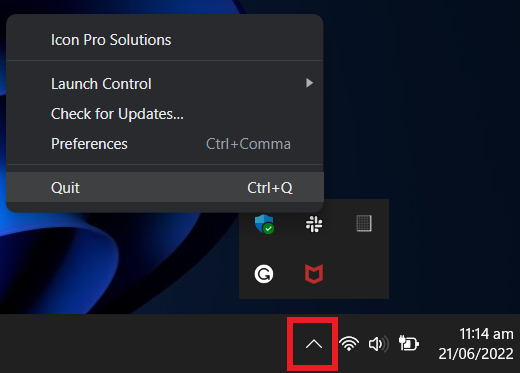
- Now close the programs that you don’t use to free up RAM
“Stay connected with us for the latest updates and insights on software development trends. Follow us on social media and visit our website for more!”
???? Website: Icon Pro Solutions
???? LinkedIn: Icon Pro Solutions on LinkedIn
???? Facebook: Follow us on Facebook
???? Dribbble: See our work on Dribbble
???? Instagram: Follow us on Instagram